
Tips + Tricks
Air Cells & Humidity | Tips for Incubating Eggs
As an Amazon Associate I earn from qualifying purchases.
The #1 question I find myself googling and obsessing over during incubation (whether it be chicken, duck, or turkey eggs) is humidity. Is it 45% or 55%? Is it too dry? Too wet? It seems much easier to control temperature and understand it since its a familiar metric we encounter every day. Humidity is a little trickier to get a handle on, paired with the fact that a lot of incubators only have a temperature gauge. One of the most helpful tricks I’ve learned when incubating eggs is how to monitor the air cells of the eggs to determine if humidity is too high, too low, or just right in the incubator.
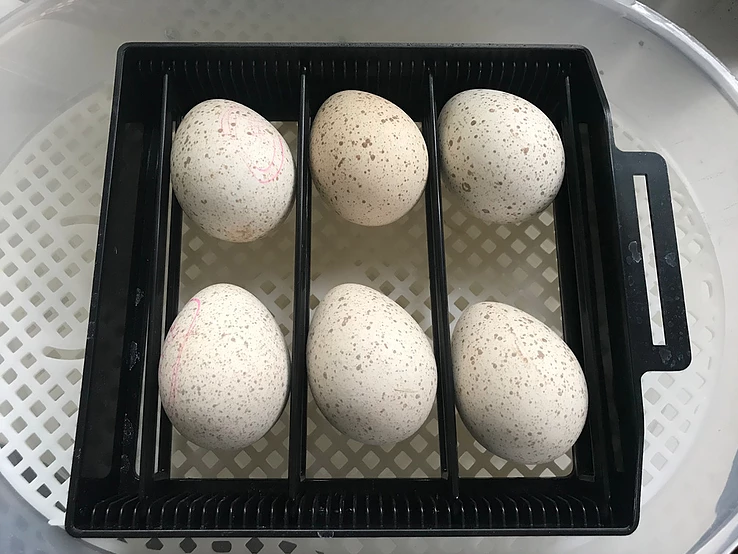
Incubating guides will all vary. Some hatchaholics keep moist sponges in the incubator, some swear by ‘dry incubating’. It really depends on what climate you are in, what incubator you use, and your eggs. But eggs will, by nature, need some humidity to develop and hatch correctly.
I never got around to ordering one of those temperature/humidity gauges everyone swears by. I have trust issues – what if its inaccurate? I couldn’t bring myself to order one because I read so many mixed reviews.
What I did have on hand, however, were plenty of bright LED flashlights and my eyeballs. Great! Let’s check some air cells. (BTW. I would recommend LED flashlights for candling because the light won’t get too hot and fry your egg. There are also a lot of rechargeable options on Amazon which is useful if you’re using it a lot.)
https://www.backyardchickens.com/articles/turkey-incubation-and-hatching-guide.65107/
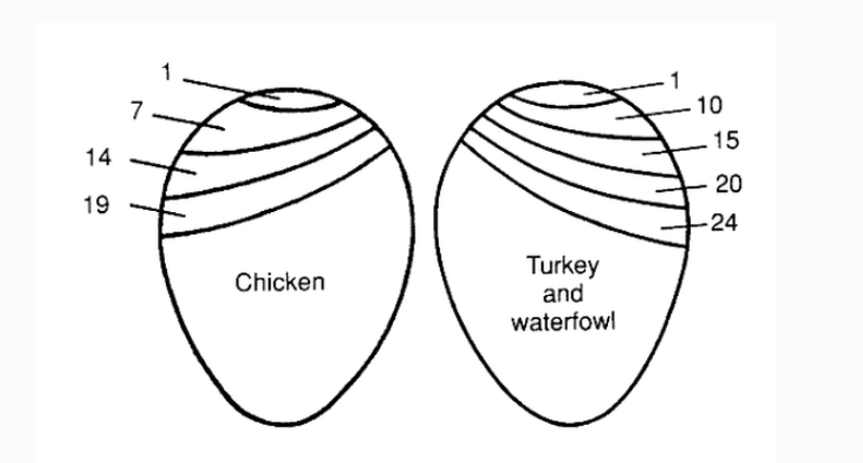
This diagram is incredibly helpful for monitoring air cells. It shows the ideal air cell size when incubating. I have it saved on my computer for quick reference. As you can see, the numbers correspond to what day you are on in the incubation process. As you get closer to hatch, the air cell will get quite large.
A little background – the air cell is that see-through pocket on the large end of the egg you can see when candling. It starts out very small then grows to almost 1/2 the egg by the time of hatch. By tracking how this air cell progresses throughout incubation you can visualize your ideal humidity.
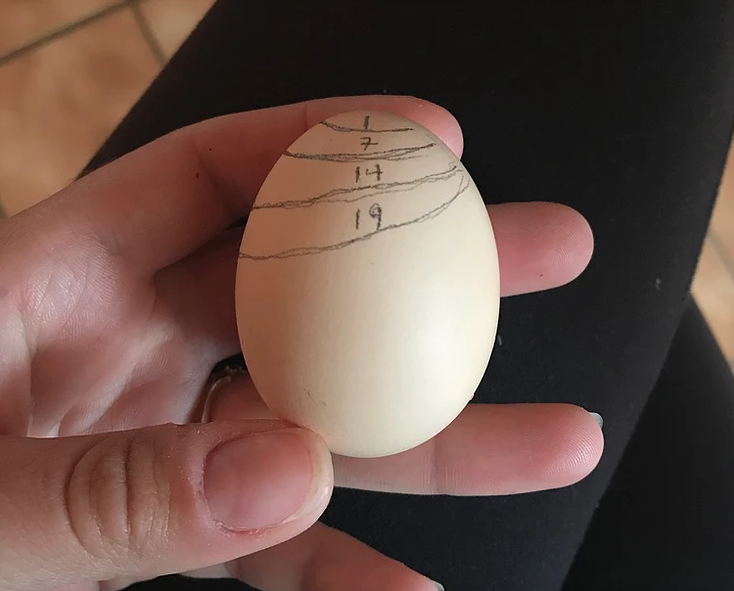
If you want to do a cool experiment to get familiar with how your eggs progress, you can trace the air cell throughout the incubation with pencil when you candle. And by the end, you will have a map of how the air cell grew.
If you want to do a cool experiment to get familiar with how your eggs progress, you can trace the air cell throughout the incubation with pencil when you candle. And by the end, you will have a map of how the air cell grew.
So what’s happening inside the incubator that causes the air cell to change?
I like to think of the part of the egg where the chick (or poult or duckling) grows as the ‘water’ and the air cell as the ‘air’. It’s a balance between water and air. The ying-and-yang of incubating.

- High humidity = small air cell.
- Low humidity = big air cell.
If your humidity is too high the porous egg will reflect that. There will be too much moisture and the air cell will be small. If your humidity is too low the air cell will get too big.
Both extremes cause issues. According to https://aglifesciences.tamu.edu:
“Insufficient humidity causes:
◆ The air cell to be too large at the time of hatch
◆ The contents of the egg be too viscous for the chick to turn
◆ The membranes to be too tough to break
◆ The navel to not close properly
Excess humidity will cause:
◆ Too little water to evaporate from the egg
◆ The air cell to be too small for the chick to reach during the hatching process
◆ The chick to drown or be too swollen with water to turn in the egg
◆ The yolk sac to be too large for the navel to close completely”
If you want to get sciencey you can check to see if any of your eggs that failed to hatch or weak chicks have these issues, and see if humidity could have been your problem. Many times it is.
It makes sense. If the humidity is too high, the chick can drown in the egg. Also, when it makes it’s first pip, the internal pip into the air cell, there can be issues. You can actually candle the egg right before you put it into lockdown and you might be able to see a little shadow of a beak peeking through into the air cell. The chick is essentially taking its first breaths!
If the humidity is too low, there isn’t enough liquid in the egg for the chick to turn around and move to escape the egg. It can get ‘shrink wrapped’ inside the egg and die. This is why you have to be careful opening the incubator to remove already hatched chicks. I leave newly-hatched babies in the incubator for as long as I can (~48 hrs usually) if I see other eggs are still trying to hatch. If you lower the humidity drastically by opening the incubator the little ones trying to pip and unzip can get trapped. High humidity during hatch keeps everything in the egg soft and pliable.
So for those of you out there that hate worrying about humidity and don’t have a gauge, don’t stress. The egg will tell you what it needs for the most part. Some issues are out of your control, but if you trust your instincts and look closely at what your eggs are doing, you will learn a lot.
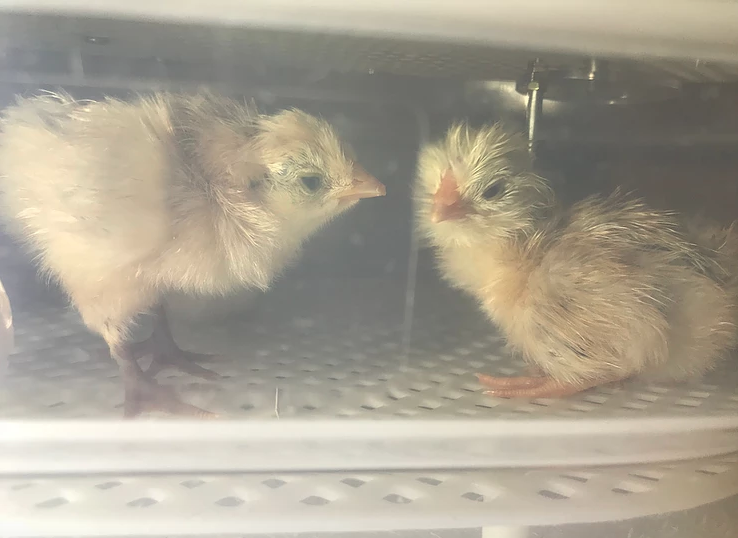
If you think about it – what we are really trying to do is imitate the conditions under mama hen (or mama turkey or duck). So think like a chicken, be patient, and enjoy your little fluffs when they hatch!


4 Comments
Beth
The egg is being held upside down in the photo of the egg with the air cell pencil tracings. The pointy side is up instead of down. Sometimes, especially with duck eggs, you can’t tell which is the pointy end without candling. But I’m pretty sure that egg is upside down.
admin
Beth, thank you for pointing that out! You are completely right. Oops! The air cell would certainly be on the opposite side of the egg. I will make a correction in the caption so others are not confused.
Kim
Just wondering, I’ve been dry hatching my eggs – the air cell does seem a little more smaller, but is that probably because of the dry hatching? I thought it was the other way around, so I’m pretty confused, haha.
Adrian
Good thing you are dry hatching then as it sounds like the ambient RH is high where you are hatching. It’s near impossible to lower the humidity but if you were adding water to your incubator it would definitely be too high and your air cell would be even smaller.