Homesteading Projects, Recipes, Tips + Tricks
How To Make Your Own Sourdough Starter
As an Amazon Associate I earn from qualifying purchases.
I’ve been dabbling in bread making for years now, but could never quite get that complex, bakery flavor and texture I loved so much. You know what I’m taking about… the chewy texture, sour tang, and crunchy crust *drooling*. I had always used the active dry yeast packets to leaven my bread. I finally realized I needed to step up my bread game.
WHAT IS SOURDOUGH STARTER
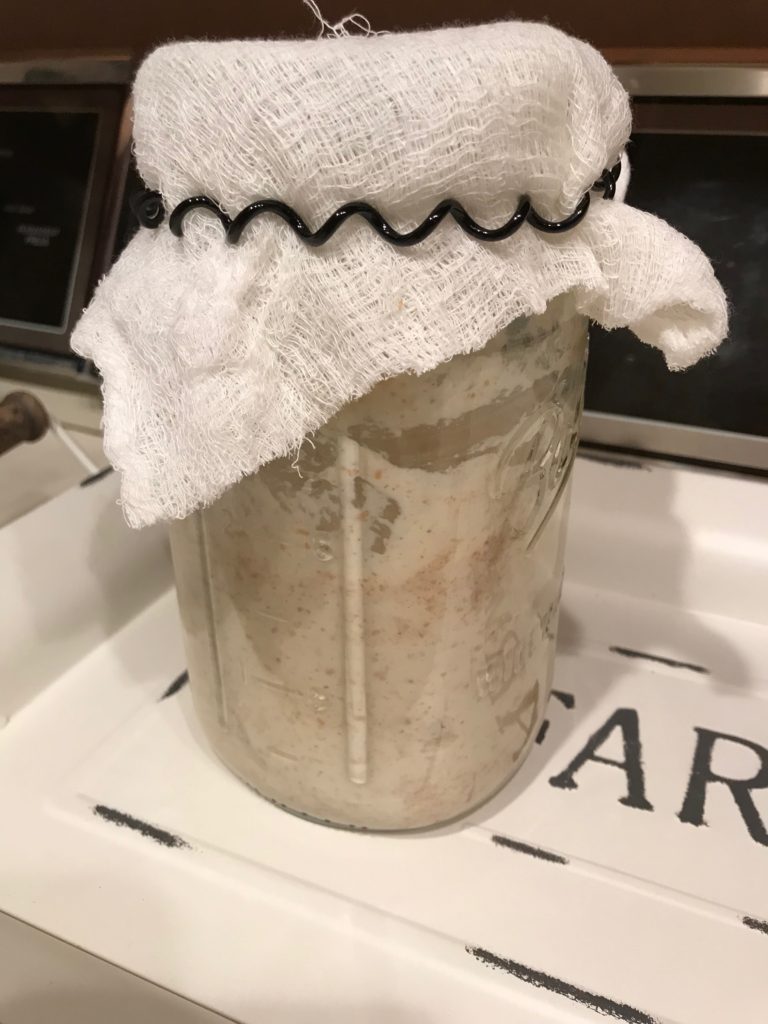
Starter is a fermented blend of flour and water. Wild yeast and bacteria naturally occur in the flour. When water is added, enzymes begin breaking down components in the flour which can feed this colony of yeast and bacteria. As you feed your starter and fuel these processes, the yeasts and bacteria multiply and eventually become a nice stable blend of microorganisms that you can maintain. Kind of like a weird science experiment pet.
GETTING STARTED
Sourdough starter is a really simple concoction. Don’t be overwhelmed by the idea of fermenting something – it’s literally just flour and water. You can get more complicated with it, like the hydration (the ratio of water in your starter), what type of flour you use, etc etc. But just start out with the basics, make a few loaves, and get a feel for it.
I followed King Arthur Flour website’s instructions for making your own starter from scratch. I’ll go through their general instructions, but I will add on my own helpful tips as well.
SUPPLIES:


- A clean glass jar or container (Minimum 1 quart size)
- Whole wheat flour (I used King Arthur Flour, Organic Whole Wheat)
- Water
- Unbleached all-purpose flour (I used King Arthur Flour, Organic Unbleached All-Purpose Flour)
- Pineapple juice [optional] (I used this to troubleshoot.. I’ll explain later)
Step 1: Add 1 cup whole wheat flour and 1/2 cup room temp or cool water* to your glass (non-reactive) container. Mix well until no dry flour remains. Cover with a clean dish towel or cheesecloth. Something that will allow air in and out, but no fruit flies or ants. Let this mixture sit at room temp for 24 hours.
*If your tap water is drinkable and not super chlorinated, it’s fine to use tap. Our water tastes horrible and is very hard, so I opted to use filtered water.
Step 2: On the second day, you probably won’t see much action. It might look exactly the way you left it on Day 1. Totally fine.
Discard approximately 1/2 your original starter. Add 1 cup unbleached all-purpose flour and 1/2 cup room temp or cool water. Mix until no dry flour remains. Recover and let it sit for another 24 hours.
Step 3: Day 3. This is when my starter suddenly erupted like The Blob. Once you start seeing activity, you’ll want to “feed” your starter with the all-purpose flour 2x a day to get it going. It helps to do this once in the morning and once at night.
Save approx. 1/2 cup of your starter in your container and discard the rest. Add 1 cup unbleached all-purpose flour and 1/2 cup room temp or cool water. Mix until no dry flour remains. Cover and leave for approx. 12 hours. It doesn’t have to be exactly 12 hours, I like to do my feedings in morning and night.
(The King Arthur instructions tell you to measure 4 ounces of starter out to feed each time (approx 1/2 cup), but I found this to be too messy. It was much easier for me to just dump the discard starter out, while leaving approx 1/2 cup in the jar, and add the new flour right into the starter. I eyeballed the 1/2 cup. )

Sidenote:
So now that you are on Day 3 and things are starting to come alive, this is when things get interesting.
Sometime between Day 3 and Day 4 for me, something horrible happened.
My starter, which had smelled like a slightly bready/yeasty, pretty normal smell Days 1-3 all of a sudden smelled like parmesan cheese and vomit. I’m not exaggerating. The whole kitchen smelled and it made Dusty gag.
Fearing I had totally messed up and done something horribly wrong, I frantically googled to see if this was common. It turns out it is.
From my understanding, sometimes when you are getting all the yeast and bacteria to grow and establish themselves, there is a period where an undesirable bacteria might take over.
(Disclaimer, if you see blue/green mold or anything of that nature growing on your new starter you’ll definitely want to throw it out and start over. But after I read about the bad smelling starter, I decided I might as well try to save it.)
One interesting method I read was to add pineapple juice to the starter during feedings. Your established starter thrives at a lower pH, but when it’s just getting started it might be off. A few people decided to try lowering the pH to rid their starter of the horrid cheese smell and found that it worked to keep the right types of yeast and bacteria in and bad bacteria out.
Some people also say that if you just continue with your daily regimen of 2x discarding and feeding, eventually the starter will balance itself. But honestly I couldn’t take the smell and decided to try the pineapple trick.
Step 4: You should be on Day 4 now. If your starter has taken on a horrific cheese smell, try adding the 1 tablespoon of pineapple juice with the all-purpose flour and water.
I only had to add pineapple juice to 2 feedings (1 day) and the next morning on day 5 the starter magically smelled like sourdough.
I would recommend adding the pineapple juice for these 2 feedings, then go back to omitting it. It should balance itself, don’t continue to add pineapple juice for further feedings. That’s just asking for mold. If your starter continues to smell horrible after maximum 2 days of pineapple juice treatment, I would start over.
When you start over try keeping the container with new starter in a different room, away from any other fermented experiments you might have growing (like kombucha). And make sure your container and hands are clean.
If your starter is cured, or if you didn’t have any issues to begin with, continue discarding and feeding 2x a day.
You will continue your typical pattern of:
-Discard starter leaving ~1/2 cup.
-Add 1 cup all-purpose flour, 1/2 cup water (and 1 tablespoon pineapple juice, optional for 1-2 days if needed)
-Mix thoroughly
-Cover and leave 12 hours.
-Repeat
Step 5: Days 5, 6, 7 and beyond… Continue the above steps until your starter is consistently being fed and rising and bubbling happily. When you feed, the starter should double or triple in size in a few hours. That’s when you know its active and ready!
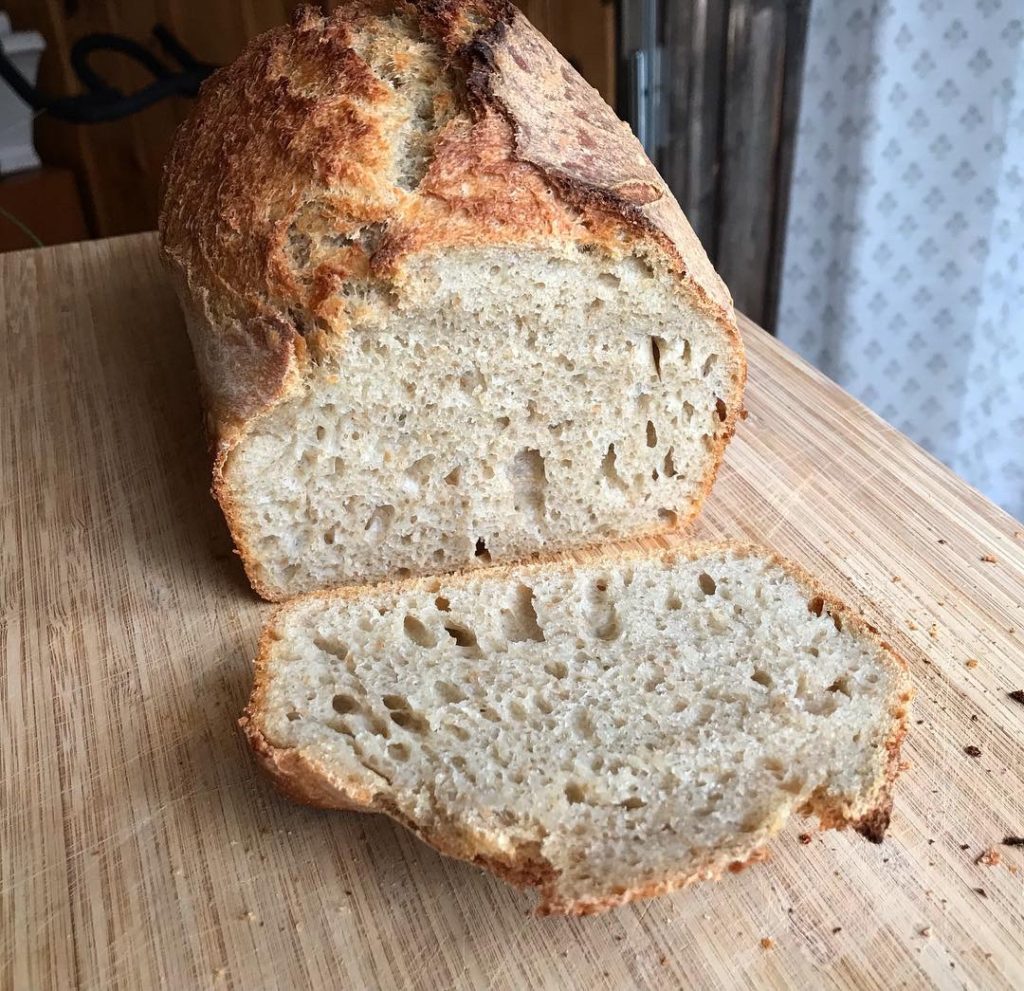
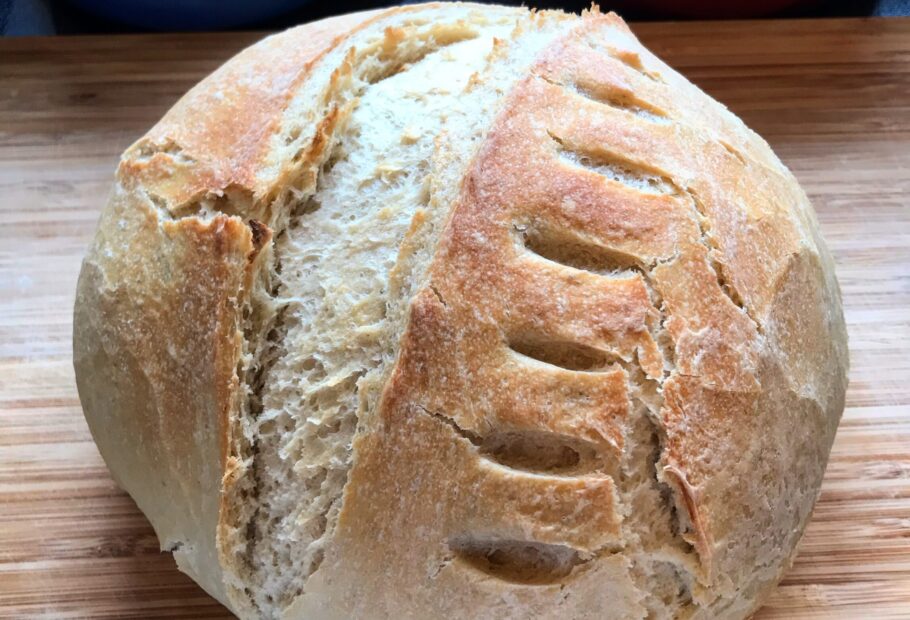
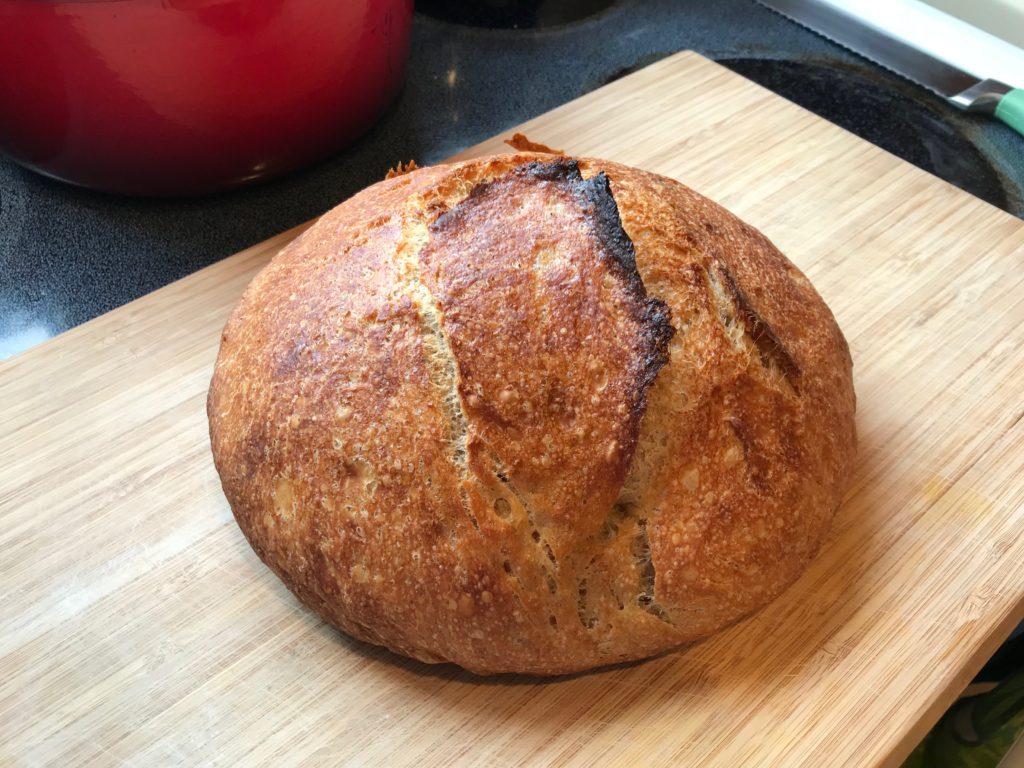
If your starter smells *normal* and is active, you can start making bread with it. The older and more developed your starter gets, the more sour and complex your bread will taste. My first few loaves weren’t super sour. Now that my starter is 6 months old, my loaves really do taste like a bakery sourdough.
STORAGE:
When you’re all baked-out and ready to store your sourdough starter for use later on, you can seal the container it’s stored in and put it in the fridge.
This is why I like to keep my starter in a jar with a screw-on lid or a glass leftover container with an airtight snap-on lid. When it is dormant and stored in the fridge you don’t want air to be able to get in. Keep it fresh.
You can pop your starter in the fridge at any point. If it’s at the end of the day and its unfed or if you just baked with it and it’s still a little active. Just put a lid on it and put it in the fridge.
MAINTENANCE:
Even when it’s in the fridge I still recommend taking it out once a week to feed. If I’m just doing a quick feed to keep it alive and there isn’t much starter left in the jar, I won’t discard. I’ll just add a heaping 1/2 cup all-purpose flour and just enough water to get it to be smooth and stirrable. I leave it at room temperature until I can see some activity, and then I put it back in the fridge.
If your starter is kept at room temperature feed it once a day, or 2x a day if you are trying to ramp up its activity to make bread.
The only reason you discard starter is because if you keep feeding it over and over with 1 cup of flour each time, you will quickly have a massive amount of starter. And if you don’t discard some of it from your jar, when you feed it might overflow and outgrow the jar. It just keeps it manageable.
And if you hate the idea of throwing out the discard every time, check out King Arthur Flour’s sourdough discard recipes. The sourdough pancake recipe is AMAZING.
If you happen to leave your starter in the fridge for longer than 1 week, it’s most likely fine. If you see a clear liquid on the surface of your refrigerated starter, this is perfectly normal. This just means your starter is hungry. You can stir the liquid back into your starter when you feed it.
Mine has always been clear, but this liquid can turn dark which means your sourdough is very hungry. Most people recommend pouring this dark liquid off into the trash and feeding the starter. If it continues to be funky or grows mold, you’ll have to toss your starter and start over.
I’ve found it helpful to schedule a weekly reminder into my phone’s calendar to take the starter out and feed it.
Next post I will go over my favorite recipe to make a delicious loaf of crusty sourdough bread!